How to Create a Fork and Test Updates
In Github a “fork” is a separate copy of a repository. You can think of it as your own sandbox where you can try anything out and copy it to the real site when you’re happy.
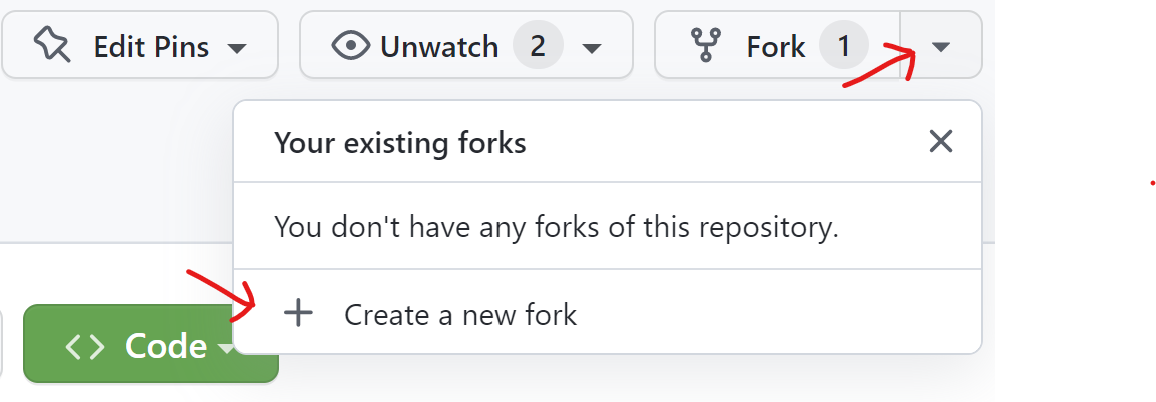
Create Fork
Click on drop down arround next to “Fork” on the top right of the page. Then select “Create a new fork”.
|  |-
|-
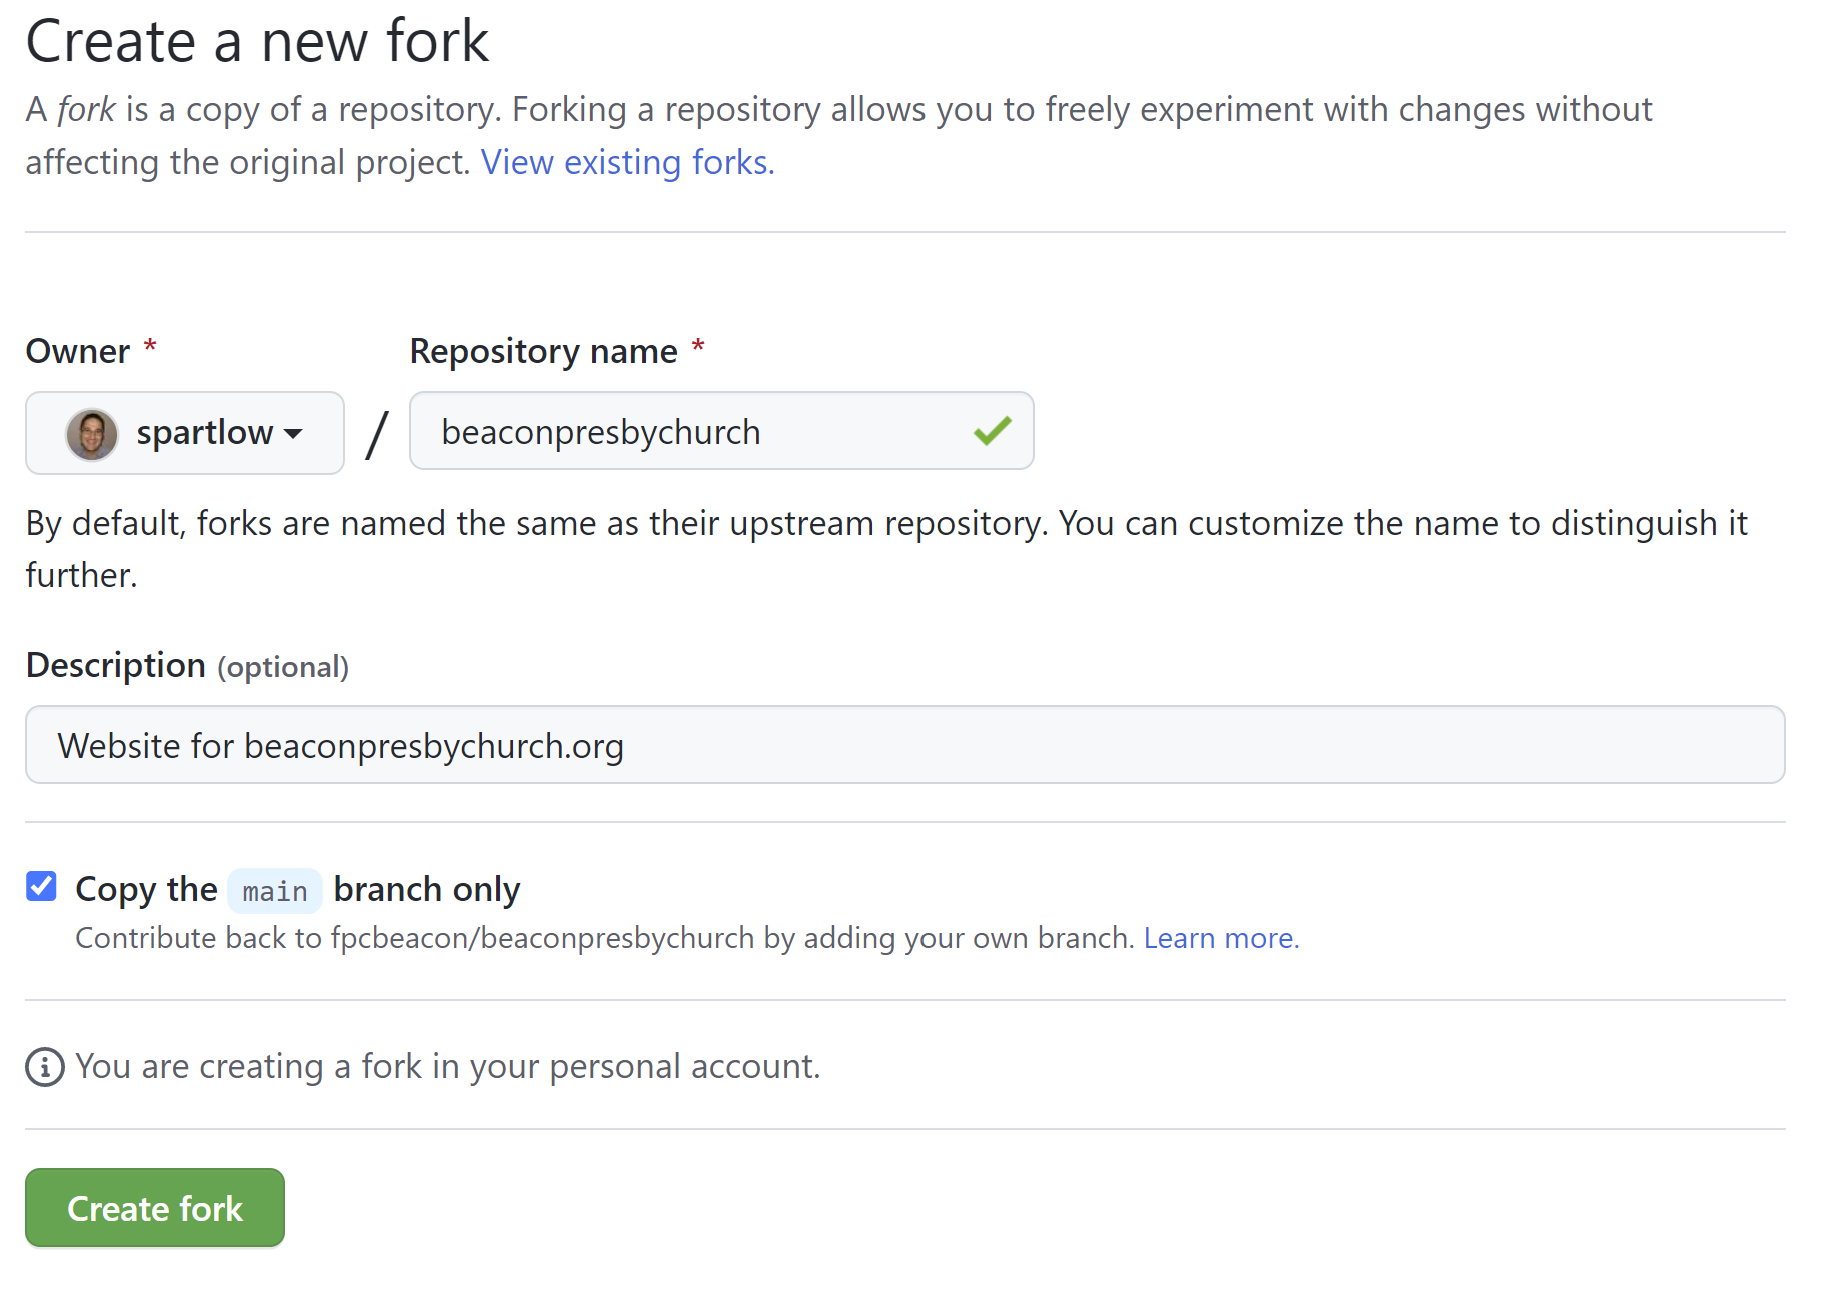
Next you should be able to take the defaults and click the “Create fork” button.
|  |-
|-
Setup Pages
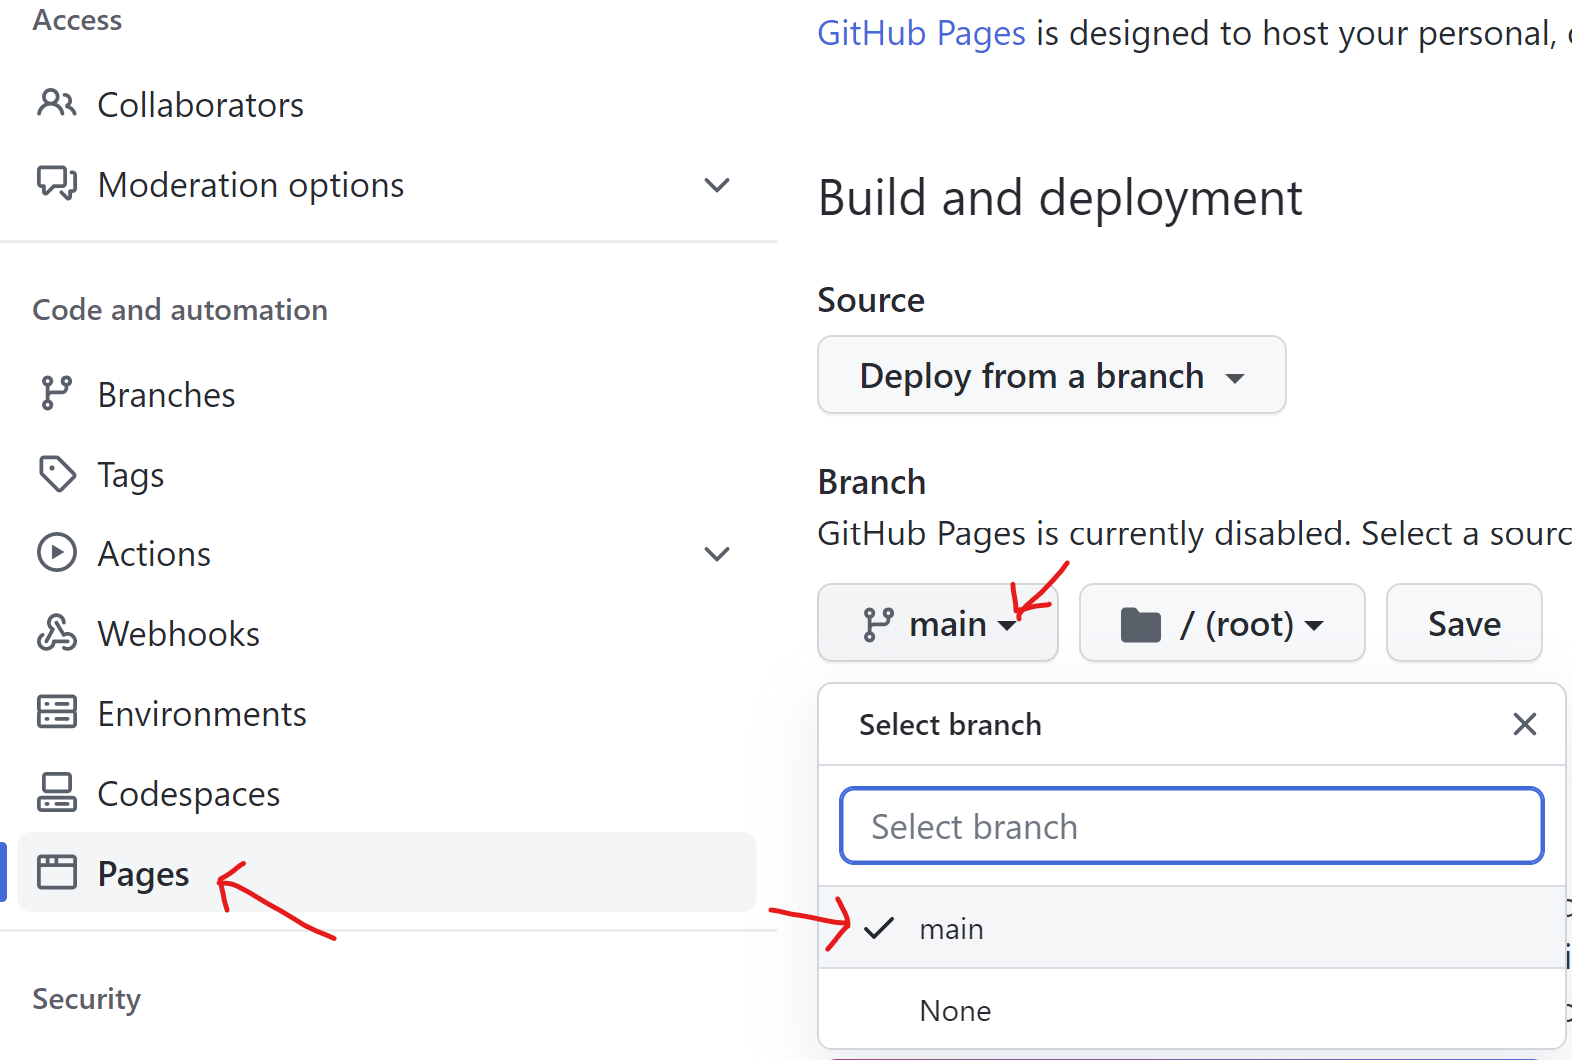
Once you have your fork, you’ll need to set up the web page feature.
To do that, click on the “Settings” tab near the top. Next select “Pages” from the left menu. From here change the branch from “None” to “main”. Then click “Save”.
|  |-
|-
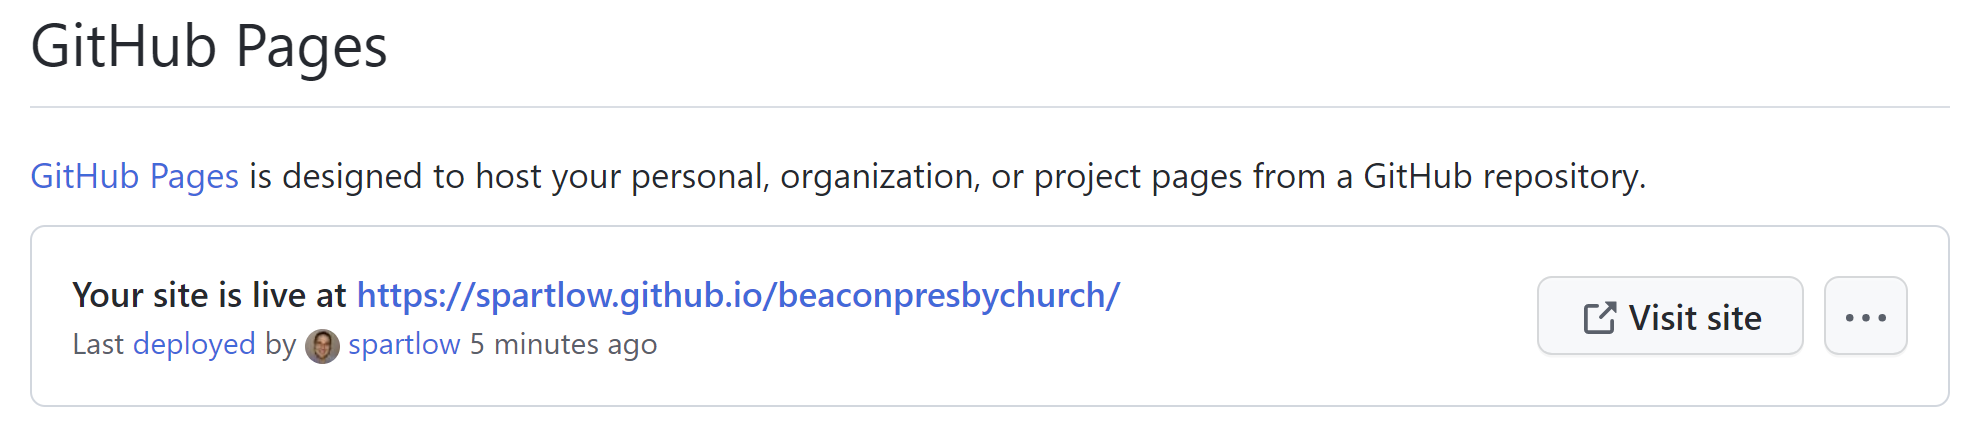
It then starts building your web page. This may take a couple minutes. When it’s done, you can refresh that page and it will show you where your private site is located. Click on “Visit site” link to view it.
|  |-
|-
Make Changes
Now you can edit files as much as you like and not worry about breaking the live site.
Just be sure to the top left has your name and not fpcbeacon / beaconpresbychurch, which is the live site.
Merging Back to Live Site
Coming soon…